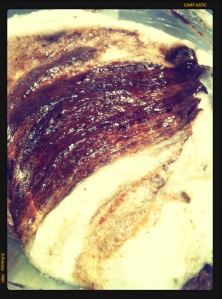
Chocolate mousse

Many people are surprised when I don’t use cream to make chocolate mousse.  This recipe probably makes enough for three people, neither my wife or I could finish our half.  You will need the following ingredients.

125g good quality dark chocolate, 2 eggs (separated), 75g honey or powdered coconut sugar, either 1 tbsp of cointreau OR 40ml espresso.

Keep the egg yolks and egg whites in separate bowls.  Into the egg yolks add the honey and espresso and mix well.

Over a bain marie melt the chocolate.  Combine the yolk/honey/espresso mixture and mix well.

Now you can start whisking your egg whites.  You want to form stiff peaks.

By now the chocolate mixture should be cool enough not to harm the beaten egg whites and you can pour two thirds of the egg whites into the bowl with the chocolate mixture.  Fold not too gently until well combined.  Pour the remaining egg whites into the chocolate and fold more gently until combined.

It’s pretty much ready to eat.  But if your inclined, you can pour the mousse into whatever vessel to set in the fridge until you wish to serve it.

Now you must be thinking all I do is make and eat chocolate.  I promise my next post will not contain any chocolate.

Posted in Chocolate | Leave a comment

Beast mode (beta)

One leg squats, hanging knee raises and handstand half pushups.

Amazing calisthenic exercises you can do at home or at the park.  Three of six exercises I began doing in August 2011 when I discovered this obscure book called “Convict Conditioning”.  Most of the exercises can be done infront of the television whenever you get a few minutes.  I would recommend this book to anyone (and have done to almost everyone I talk to haha) because the six exercises are each broken down into ten stages of difficulty ranging from absolute beginner to the expert levels (e.g. one arm pull-up or one arm pushup).  Each of the difficulty stages work a range of major muscles and stabiliser muscles preparing you for the more difficult stages ahead.

One leg squats, hanging knee raises and handstand half pushups isn’t where I started though.  The book recommends anyone thinking of starting the routine to begin at the very start, no matter what strength level they are at.  I looked at the beginner stages and kinda inwardly laughed, but you find out how weak you really are when you begin to notice the strain after 2 x 50 wall pushups.  And you’re only two thirds there!  haha :S

My quickest progression was with squats.  Maybe it was because of a previous strength base from my Water Polo days of playing ‘Center Forward’, but for some reason I breezed through these exercises.  The shoulder stand squats, although at first the hardest part was to balance and perform these with good form, I found them really really fun.  That always helps make exercise easy though.  It wasn’t until I started the one leg squat that I struggled.

The biggest struggle I encountered was the abdominal routine with knee tucks.  It took me weeks of doing two a day, three times a week to make the progression standard of 3 x 40.  They work all sorts of muscles and introduce you to new ones.  And this was just stage one, absolute beginner haha.  After that though I have noticed a profound increase in strength, nothing I had ever achieved doing sit-ups or ‘crunches’, and I’m now at the stage where I’ve achieved more than I had hoped.

Although I’m not doing a great deal of repetitions in any of the exercises, or investing a lot of time overall, I’ve have gained noticeable results.  I wish I had taken before and after photos, but unfortunately I don’t have any progress pics to share.  I will work on getting some photos of the exercises being performed though.  That will give me an excuse to share more about my weekly routine and track my progress.

I have broken down the exercises into two sets to be done during the week when convenient.  To progress on some of the more difficult exercises though, I’ll add another day to get in an extra set whenever needed, or concentrate on one extra exercise.  Some weeks I will work out twice, some once, some four times.  Generally my weekly workout totals an hour or less.  Currently the main categories I am doing:

Legs, shoulders, abs:

2 x 14 one leg squats, 2 x 10 handstand half pushups, 3 x 25 hanging knee raises

One day I did 1 x 20 one leg squats and 3 x 25 hanging knee raises.  These destroyed my thighs haha, in a good way.  For four days afterward I struggled going up and down stairs, traversing flat plains, yet, I still went on my 5km run.  Loved it.

Chest, arms, back:

4 x 10 full pushups, 3 x 15 inverted rows, 2 x 10 angled bridges.

The best thing about these exercises is that they don’t cost anything, they don’t require any special equipment that cannot be found at home or at a park.  I am approaching all of my exercises in a sustainable manner, all too often projects become too time consuming and unrealistic to continue and procrastination takes over and they never get done.  I don’t see the point in trying to do these every day, or even 5 days a week so I prefer to do them on a convenience basis.  The results I’ve achieved tells me I am on the right track.

I never thought along the lines of,  ‘I want to get ripped’ or, ‘I want a six pack’.  I only ever wanted some functional practical strength.  I am however, now that I am on this road to fitness, very much looking forward to achieving the one armed handstand.

Posted in Convict conditioning, Fitness | Leave a comment

Running man

I had never run more than 1km before I turned 30.

Running feels amazing.  There aren’t many things I love more.

I think I began running late in 2010.  It’s hard to describe why, most people I talk to hate running.  They either force themselves to to do so, or will avoid running unless faced with a life threatening situation.

Although I had just bought my first pair of Vibram Five Fingers not long before, I actually began running barefoot.  I was investing a lot of time researching the benefits and especially the technique of barefoot running.  Years and years ago (when I was not a runner), I was a heal striker.  I had no idea there was another way to run.  Once I had tried running without shoes, I was hooked.  Besides the difference in form, there is something very different about running barefoot.  It may be the connection to the Earth, or that it’s just a more comfortable style of running, but I just couldn’t wear shoes anymore.  They had become uncomfortable.  Since then the only shoes I have worn are my safety shoes at work, and a pair of dress shoes for special occasions and Dunlop volleys.   My VFF’s became my walking shoes.  Until now.  I now own a pair of vivobarefoot ‘aqua lite’ runners, which have replaced my Dunlop volleys.  I use these when I run on an unfamiliar path, usually at night, or when it’s cold.

It’s been an interesting journey learning how to run, and I’ve had to rethink a few of my running goals along the way, but I’ve now decided that 5km is a respectable distance and I will be happy with that for 12 months before I add more distance.  Keep in mind it’s 5km, Barefoot.

Now I’m running 5km twice a week with a friend since coming home from my trip to India in July.  For 6 months I had not run due to an injury.  In 2011 I fractured my second metatarsal and was unable to run for 2 months.  The injury that had stopped me running was similar to the injury which led to the fracture just over a year ago.  After 5 weeks of light duties travelling India I decided it was time to get back into running.

My goal now is to finish the Sydney “City to Surf” in August 2013.  Barefoot.  It will be my first ever competition run.  Having reassessed all my running goals, I’m really looking forward to competing.  I’ll be sharing my training progress here.

Posted in Fitness, Running | 2 Comments

Homemade chocolate

So after a 7 day working week I finally have my second weekend off in the better part of two months.. ugh.

I started the weekend off at 8am with a 5km run.  The weather is pretty average this weekend but it was a really good way to start the day.  The run left me feeling so good, it was the perfect way to prepare me to make my chocolates.

This is the first ever time I’ve worked with cocoa butter.  I’ve had experience tempering couverture chocolate, but working from absolute scratch is a different beast.  Combined with the fact I haven’t worked with chocolate since October 2011.  I’ll just say they didn’t turn out perfect.  But they are good enough! :S

Working with this sort of chocolate has been a dream of mine for many years now, so I was ready for the challenge!  And with the sale online at Loving Earth in July, I just had to take advantage.

One hundred dollars later, I wanted to make a dark chocolate with as few ingredients as possible, but added some raw maca powder for an added nutritional boost.  I’d never heard of the stuff either so I was curious.

Looking back I should have started out with the LE chocolate kit.  I presume they would have given some guidance to the quantities needed.  However, that never happened.  What DID happen was that I ended up with about 430g of chocolate.

225g Cocoa, 15g Maca powder, 40g Coconut sugar, 150g Cocoa butter.  So I’m not 100% sure how it’s calculated but I think thats 80% dark chocolate.  Feel free to correct me.

Keeping the cocoa butter separate I melted it over my bain marie.  I was treating the butter like I would pre mixed dark chocolate, so I didn’t want the temperature to go much higher than 47 – 50 degrees celsius.  At this stage the other ingredients were mixed in and well combined.  I then reheated the mixture to 50 degrees.

After everything was as smooth as possible I cooled the mixture to 27 degrees.  This is the point where a mixture of unstable and stable crystals can begin to form.  Once at 27 degrees the chocolate mixture is heated to 32 degrees.  At 32 degrees all unstable crystals will melt and only stable crystals will remain.  These will give the chocolate it’s sheen and crisp texture.  Stirring the chocolate and keeping the temperature stable at 32 degrees will help the formation of more and more crystals.


The chocolate is now ready to be set.  I’m not lucky enough to have those awesome heart shaped moulds that LE use for their Luvju range (Yes I asked if they were available!).  But I do have a pretty cool mould for chocolate making occasions.  Pour it in, scrape off  the excess and let it set.  Once the chocolate is set, I left it alone for a couple of hours and went shopping, they should just pop out when you turn the mould upside down and tap it lightly.

Voila!

I’m not too upset about the grainy texture of the coconut sugar.  I wasn’t able to get it as fine as I wanted.  At the moment I’m using a really cheap, really small food processor.  So for a first ever attempt I’m super happy!

Now I just need to stop myself from eating them ALL.  My wife doesn’t particularly like very dark chocolate.  That just means more for me.

Posted in Chocolate | Leave a comment

Welcome!

Hi!

Someone recently told me I should start a blog, just a few days before my visiting parents told me I should be doing a very similar project.  So this it it!  My first ever blog.

I’ve had a passion for making chocolates for some time now.  Whilst working in restaurants I’ve had amazing opportunities to learn all sorts of things.  My favourite things to make ironically, are sweets.  After all I wasn’t always paleo.  Although now having kicked the sugar cravings, making confectionary is still incredibly soothing and relaxing.  Provided things go as planned haha.

It’s hard to find healthy chocolate these days.  Even some of the ones that claim to be healthy have a bunch of ingredients that are not doing anyone any favours.  I’ve gone ahead and bought some raw cocoa butter, cocoa powder and coconut sugar and some delicious Medjool dates.  Evaporation of the coconut sap and the grinding of the sugar into a powder are the only manufacturing processes coconut sugar undergoes.  It’s been used as a sweetener for thousands of years.  Highly nutritious!

Whilst my equipment at home is pretty primitive, all you really need is a saucepan, a stainless steel bowl that fits over the saucepan and a digital thermometer.  This will be the first time I’ve tempered raw cocoa butter, but the principle is the same as if tempering dark chocolate.  So I think it’s appropriate to begin my blog with chocolate!

Watch this space!  Or not, whatever is fine.

Posted in Introduction | Leave a comment